Fluorescence Microscopy Basics: Excitation, Emission and Filters
Fluorescence microscopy is one of the most heavily used tools in life science research. It reveals structures that ordinary brightfield cannot show, and it does so with a special kind of light: fluorescence. Understanding where that light comes from and where it goes is the first step to choosing and using a fluorescence microscope well.
1. Where fluorescence comes from
When certain substances, known as fluorophores, are illuminated at a particular wavelength, they absorb energy and jump to an excited state, then fall back to the ground state and emit light. The key point is that the emitted light has a longer wavelength than the excitation light; the difference is called the Stokes shift. Because the two wavelengths differ, filters can separate them: only emitted fluorescence reaches the eye or the camera while the excitation light is blocked, and the image stays clean.
2. The three-part filter set
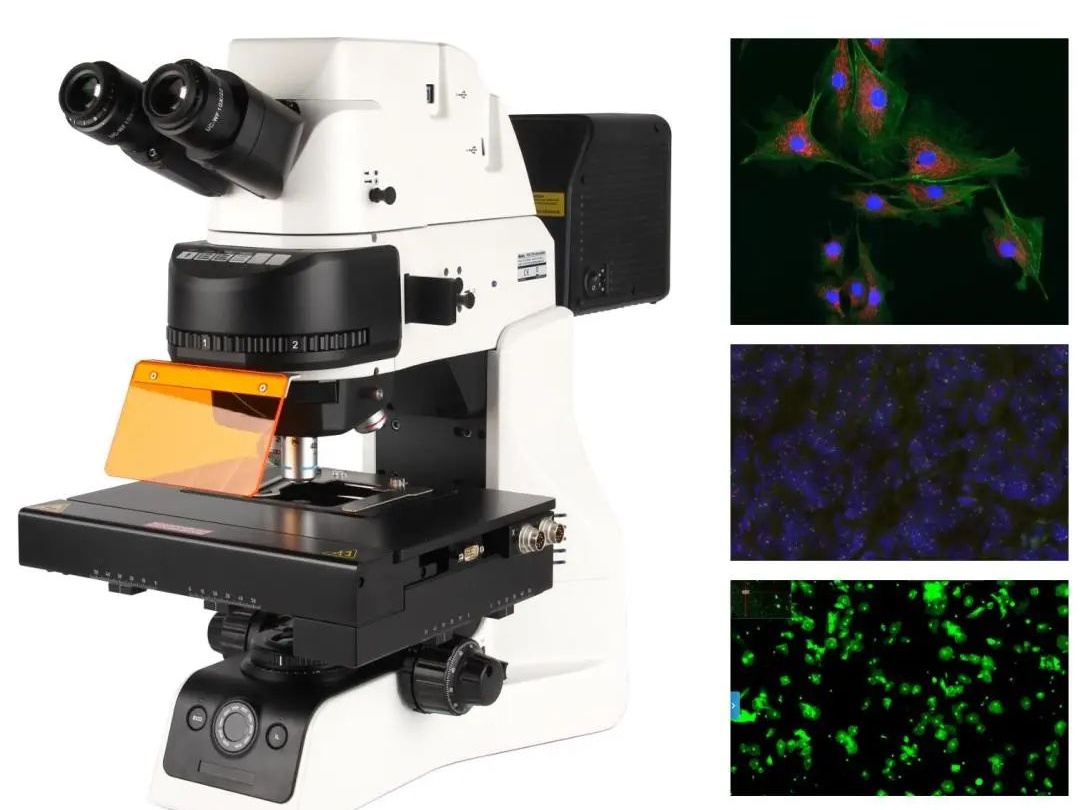
A fluorescence light path is built around three elements: the excitation filter, which selects the excitation wavelength from the source; the dichroic mirror, which sorts light by wavelength, reflecting excitation down onto the sample and transmitting emission up to the detector; and the emission filter, which removes any residual excitation and passes only fluorescence. Together they form one fluorescence channel, and a microscope can carry several sets for different labels.
3. Common fluorescence channels
DAPI is blue and stains nuclei; the green channel, usually FITC or GFP, is used for labelling proteins and antibodies; the red channel includes TRITC and CY3; longer wavelengths such as CY5 serve multicolor work. Multicolor experiments need attention to bleed-through between channels, so leave enough wavelength separation when specifying filters.
4. Choosing a light source
Traditional fluorescence microscopes use mercury lamps: strong at specific spectral lines, very bright, but hot, short-lived, needing warm-up time and containing mercury. LED sources are increasingly common, switchable per channel, long-lived, stable and easy to maintain, although some channels are less bright than a mercury lamp. Decide on the basis of the channels you actually need.
5. Points to watch in use
Fluorescence fades with exposure, so keep illumination time short and intensity low, and focus before opening the shutter. Store labelled samples in the dark so the label does not decay early. Immersion oil and coverslips must match the objectives or imaging suffers. For live-cell fluorescence, weigh phototoxicity on the cells as well.
The barrier to fluorescence microscopy looks like hardware but is really an understanding of light. Once the logic of excitation, emission and filters is clear, and you configure around your own labels and channel needs, you end up with a fluorescence system that genuinely works. Where multicolor, live-cell or long observations are planned, weigh camera sensitivity and source stability into the decision as well.